That's right...four or so days in, and I've achieved my ultimate goal in life, being featured on Foodgawker.com. Okay, maybe it's not my only goal (there is still owning my own island, making my first million, achieveing personal enlightenment, etc.), but seriously. YES!
In any case, if you're reading this, you're probably related to me or found me through Gawker anyway. So welcome Gawkers! Okay, and the other big news is....
*drumroll*
My tech saavy husband has purchased me my very own domain name. So come on over to http://guiltykitchen.com and help welcome me to the Blogoshpere. Yay!
Tuesday, July 21, 2009
Friday, July 17, 2009
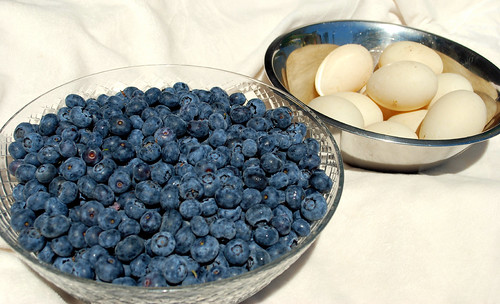
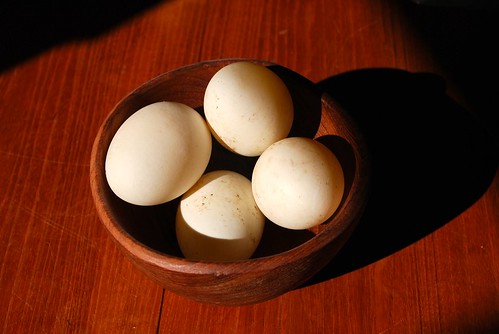
Blueberries and Duck eggs
I've got both today. I'm still thinking about what to do with them.


Eventually I did figure something out. We needed to eat something for dinner tonight. I thought I'd use those lovely duck eggs my Mother-in-Law gave us. So here's what I made:
Duck egg Omelettes with fresh Garden Pesto, Spinach and Goat Feta.
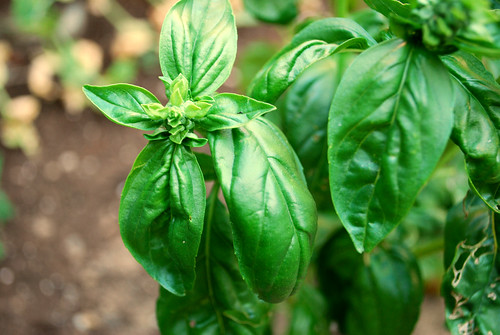
I started here, in the garden, with my basil.
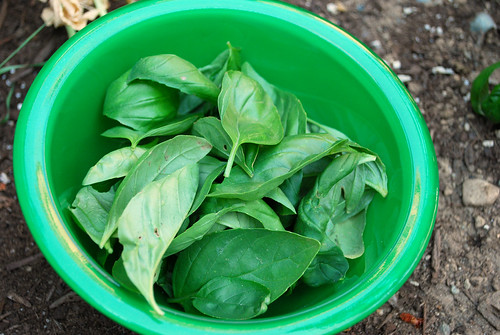
Then I cut off all it's leaves.....muah ha ha ha ha. Well, I left a couple, but not many.
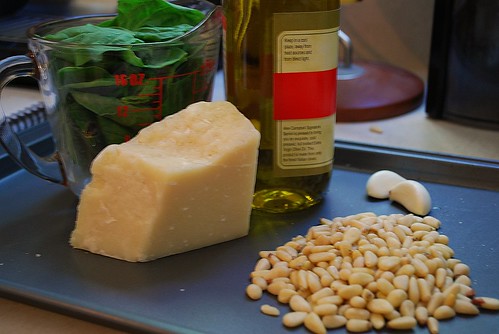
Then I got all these lovely things together for some delicious Pesto.
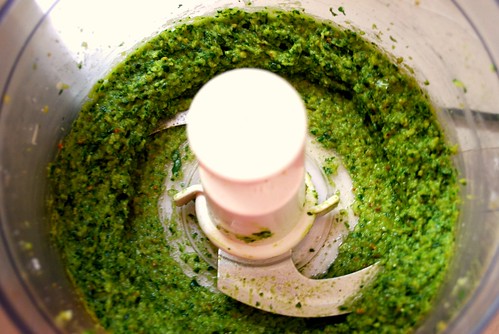
Then I whirred them all together in the food processor. It smelled divine!
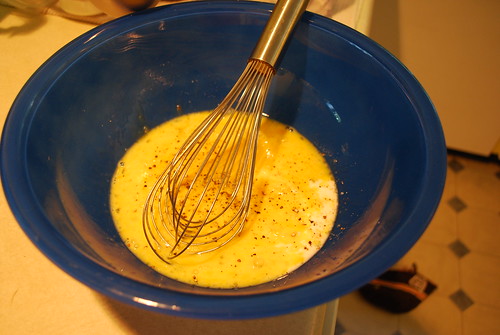
Then I took these, lovely, fresh duck eggs, and mixed them up with a little whole milk and some salt and pepper.
I'll spare you the poorly lit shots of me actually cooking them, and flipping them with one good flick of the wrist. Although it was mighty impressive, I must say.
Anyway, they turned out like this:
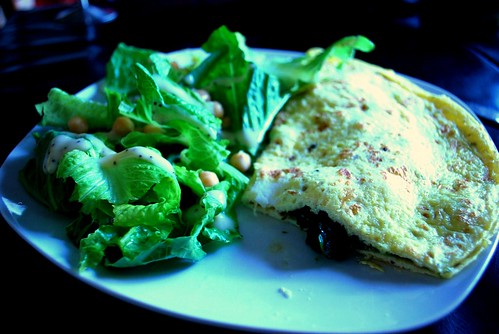
Please excuse the side dish. I like to call that "Haven't gone grocery shopping salad" or Romaine lettuce with chick peas, extravagant!
I used a very hot non-stick skillet, and no oil.
And here is the recipe:
Garden Pesto:
2 cups fresh Basil leaves (packed)
1/3 cup pine nuts (roasted)
2 cloves garlic
1/3 cup grated Parmesan cheese
1/4 cup extra virgin olive oil
1. Put everything, except oil, into food processor.
2. Whir until chopped very fine.
3. While mixer is running, add oil until combined.
4. Store in tightly sealed container and consume as soon as possible (3-4 days) or freeze in small batches for future use.
Eventually I did figure something out. We needed to eat something for dinner tonight. I thought I'd use those lovely duck eggs my Mother-in-Law gave us. So here's what I made:
Duck egg Omelettes with fresh Garden Pesto, Spinach and Goat Feta.
I started here, in the garden, with my basil.
Then I cut off all it's leaves.....muah ha ha ha ha. Well, I left a couple, but not many.
Then I got all these lovely things together for some delicious Pesto.
Then I whirred them all together in the food processor. It smelled divine!
Then I took these, lovely, fresh duck eggs, and mixed them up with a little whole milk and some salt and pepper.
I'll spare you the poorly lit shots of me actually cooking them, and flipping them with one good flick of the wrist. Although it was mighty impressive, I must say.
Anyway, they turned out like this:
Please excuse the side dish. I like to call that "Haven't gone grocery shopping salad" or Romaine lettuce with chick peas, extravagant!
I used a very hot non-stick skillet, and no oil.
And here is the recipe:
Garden Pesto:
2 cups fresh Basil leaves (packed)
1/3 cup pine nuts (roasted)
2 cloves garlic
1/3 cup grated Parmesan cheese
1/4 cup extra virgin olive oil
1. Put everything, except oil, into food processor.
2. Whir until chopped very fine.
3. While mixer is running, add oil until combined.
4. Store in tightly sealed container and consume as soon as possible (3-4 days) or freeze in small batches for future use.
Makin' Pie
That's right. It's July, cherry season. We've just returned from the Okanagan, Canada's answer to California. They have the best cherries. I have 20 lbs. to find a use for. So I will make pie. See here later for pictures and recipe.
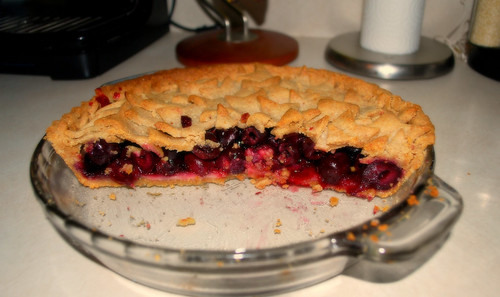
Okay it is now later, the pie has been eaten. It was good, but I think some changes could be made. Mostly that fresh as fresh cherries should be used and not "on their last legs" cherries. These were not so juicy and the pie turned out a bit dry. Other than that it was a hit!
Recipe for Cherry Pie (makes one 9 inch double crust pie)
Crust (Adapted from TheKitchn.com)
1/4 cup ground dessicated coconut
3/4 cup Whole grain whole wheat flour
1/2 cup almond meal
1 cup all purpose flour
1 cup very cold unslated butter ( I froze mine), cubed
3 1/2 Tbsp. Raw agave nectar
1 tsp. vanilla extract (if you choose to use vanilla bean instead, you will need an extra tsp. of some kind of liquid)
Before beginning, ensure all ingredients are extremely cold.
#1. Pulse all dry ingredients until well blended.
#2. Add cubed butter, pulsing until a coarse meal forms.
#3. Adding a tbsp. at a time, pour agave nectar, then vanilla into dry ingredients. Mix until a dough forms.
#4. Divide dough into two parts, one larger than the other. Flatten into discs, wrap in plastic and refrigerate for at least 1 hour.
#5. Make filling!
Cherry Pie filling:
5 cups pitted fresh cherries
4 tbsp. cornstarch
3 Tbsp. Raw agave syrup
Juice of half a lemon
1 Tbsp. cold unsalted butter
#1. Stir all ingredients together in large bowl. Place in refrigerator until ready to use.
Assembling your pie:
#1. Remove larger disc from fridge and knead until workable. Roll out to 1/8" thickness.
#2. Fit dough into pie dish, trim edges. Wrap in plastic and refrigerate for 30 minutes.
#3. Pour filling in and dot with 1 Tbsp. butter.
#4. Wrap and chill again while you roll out the other disc of dough.
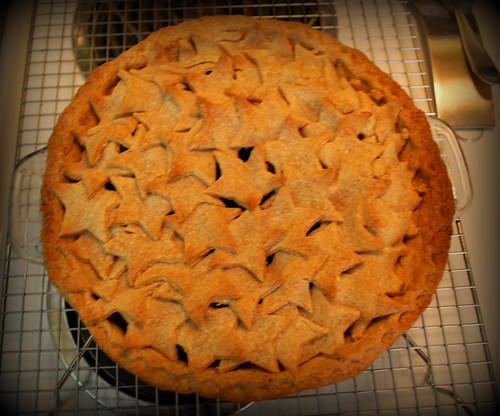
#5. After rolling, cut dough into desired shapes and, using a spiral formation, fill the top of your pie, leaving small spaces where possible for steam to escape.
#6. Cover edges in foil and bake at 325 F for 40 minutes, Remove foil and bake for about 8 mintues longer or until golden brown.
#7. Cool and devour!
Okay it is now later, the pie has been eaten. It was good, but I think some changes could be made. Mostly that fresh as fresh cherries should be used and not "on their last legs" cherries. These were not so juicy and the pie turned out a bit dry. Other than that it was a hit!
Recipe for Cherry Pie (makes one 9 inch double crust pie)
Crust (Adapted from TheKitchn.com)
1/4 cup ground dessicated coconut
3/4 cup Whole grain whole wheat flour
1/2 cup almond meal
1 cup all purpose flour
1 cup very cold unslated butter ( I froze mine), cubed
3 1/2 Tbsp. Raw agave nectar
1 tsp. vanilla extract (if you choose to use vanilla bean instead, you will need an extra tsp. of some kind of liquid)
Before beginning, ensure all ingredients are extremely cold.
#1. Pulse all dry ingredients until well blended.
#2. Add cubed butter, pulsing until a coarse meal forms.
#3. Adding a tbsp. at a time, pour agave nectar, then vanilla into dry ingredients. Mix until a dough forms.
#4. Divide dough into two parts, one larger than the other. Flatten into discs, wrap in plastic and refrigerate for at least 1 hour.
#5. Make filling!
Cherry Pie filling:
5 cups pitted fresh cherries
4 tbsp. cornstarch
3 Tbsp. Raw agave syrup
Juice of half a lemon
1 Tbsp. cold unsalted butter
#1. Stir all ingredients together in large bowl. Place in refrigerator until ready to use.
Assembling your pie:
#1. Remove larger disc from fridge and knead until workable. Roll out to 1/8" thickness.
#2. Fit dough into pie dish, trim edges. Wrap in plastic and refrigerate for 30 minutes.
#3. Pour filling in and dot with 1 Tbsp. butter.
#4. Wrap and chill again while you roll out the other disc of dough.
#5. After rolling, cut dough into desired shapes and, using a spiral formation, fill the top of your pie, leaving small spaces where possible for steam to escape.
#6. Cover edges in foil and bake at 325 F for 40 minutes, Remove foil and bake for about 8 mintues longer or until golden brown.
#7. Cool and devour!
Subscribe to:
Posts (Atom)